Tales along the way in my quest to Integrate Everything.

A strip of 5050 LED lights illumintate the stairs of my deck.

A strip of 5050 LED lights illumintate the stairs of my deck.


This past weekend I did some work in the yard, preparing it for the inevitable winter. One of the things that has long been on the back burner was to put up some lights in the back yard. When it is dark out, it can be very treacherous making one’s way around on the snow and ice in the dark. Several weeks ago Mark gave me some outdoor lights, a gesture that proved just enough of a spark to ignite a smoldering idea.

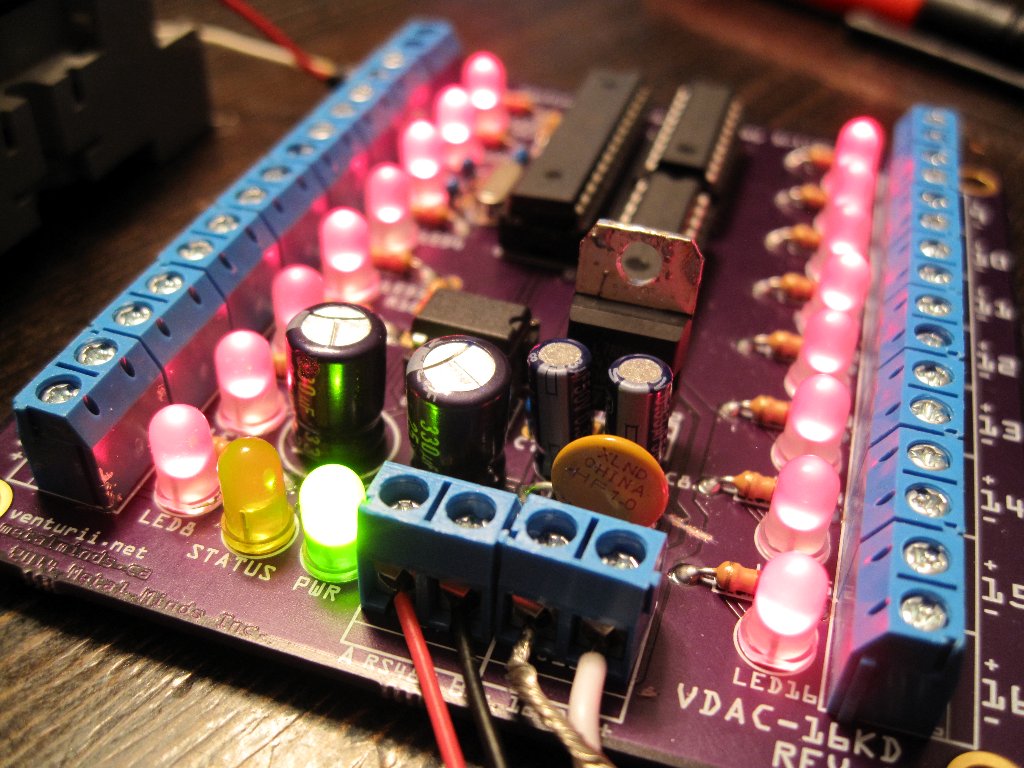
The lights seen on the stairs above are waterproof LED strips I bought from Aliexpress. So far, they’ve worked very well having survived a summer and a fall, complete with more than a couple of rainfalls. The winter may prove another story, but that will come in good time. Seen above at 16/255 power output from a prototype Venturii VDAC controller, they are more than bright enough to see in the dark. At full power, they are almost too bright. Even as it is, the light reflected off the deck surface from the LED strips shines on my bedroom ceiling if the Venetian blinds are tilted the right way.

Cup style "Moon Light" mounted on a fence post

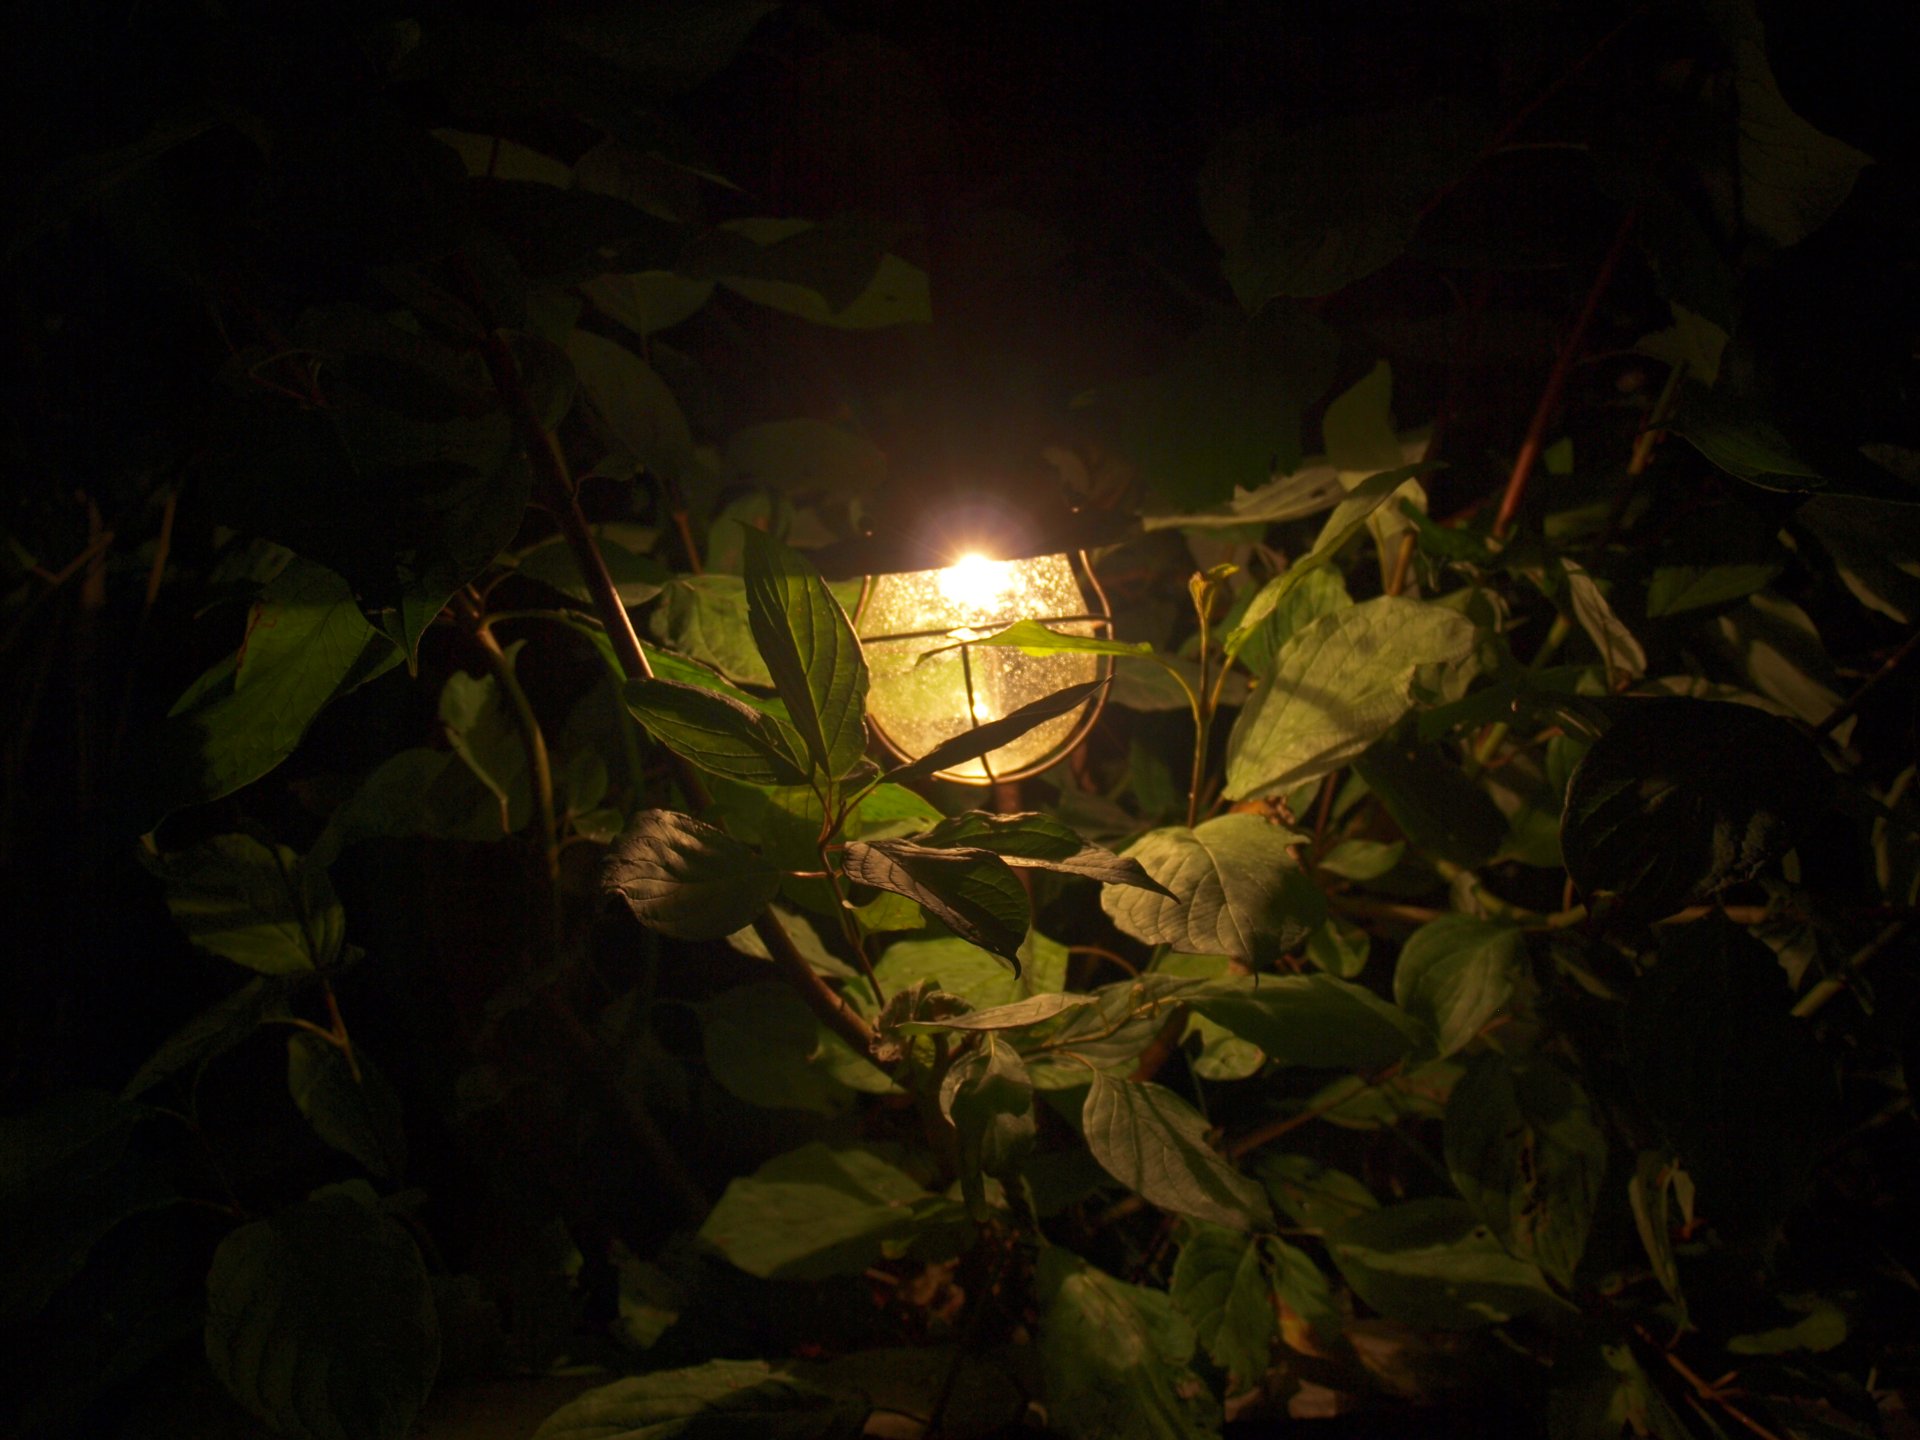
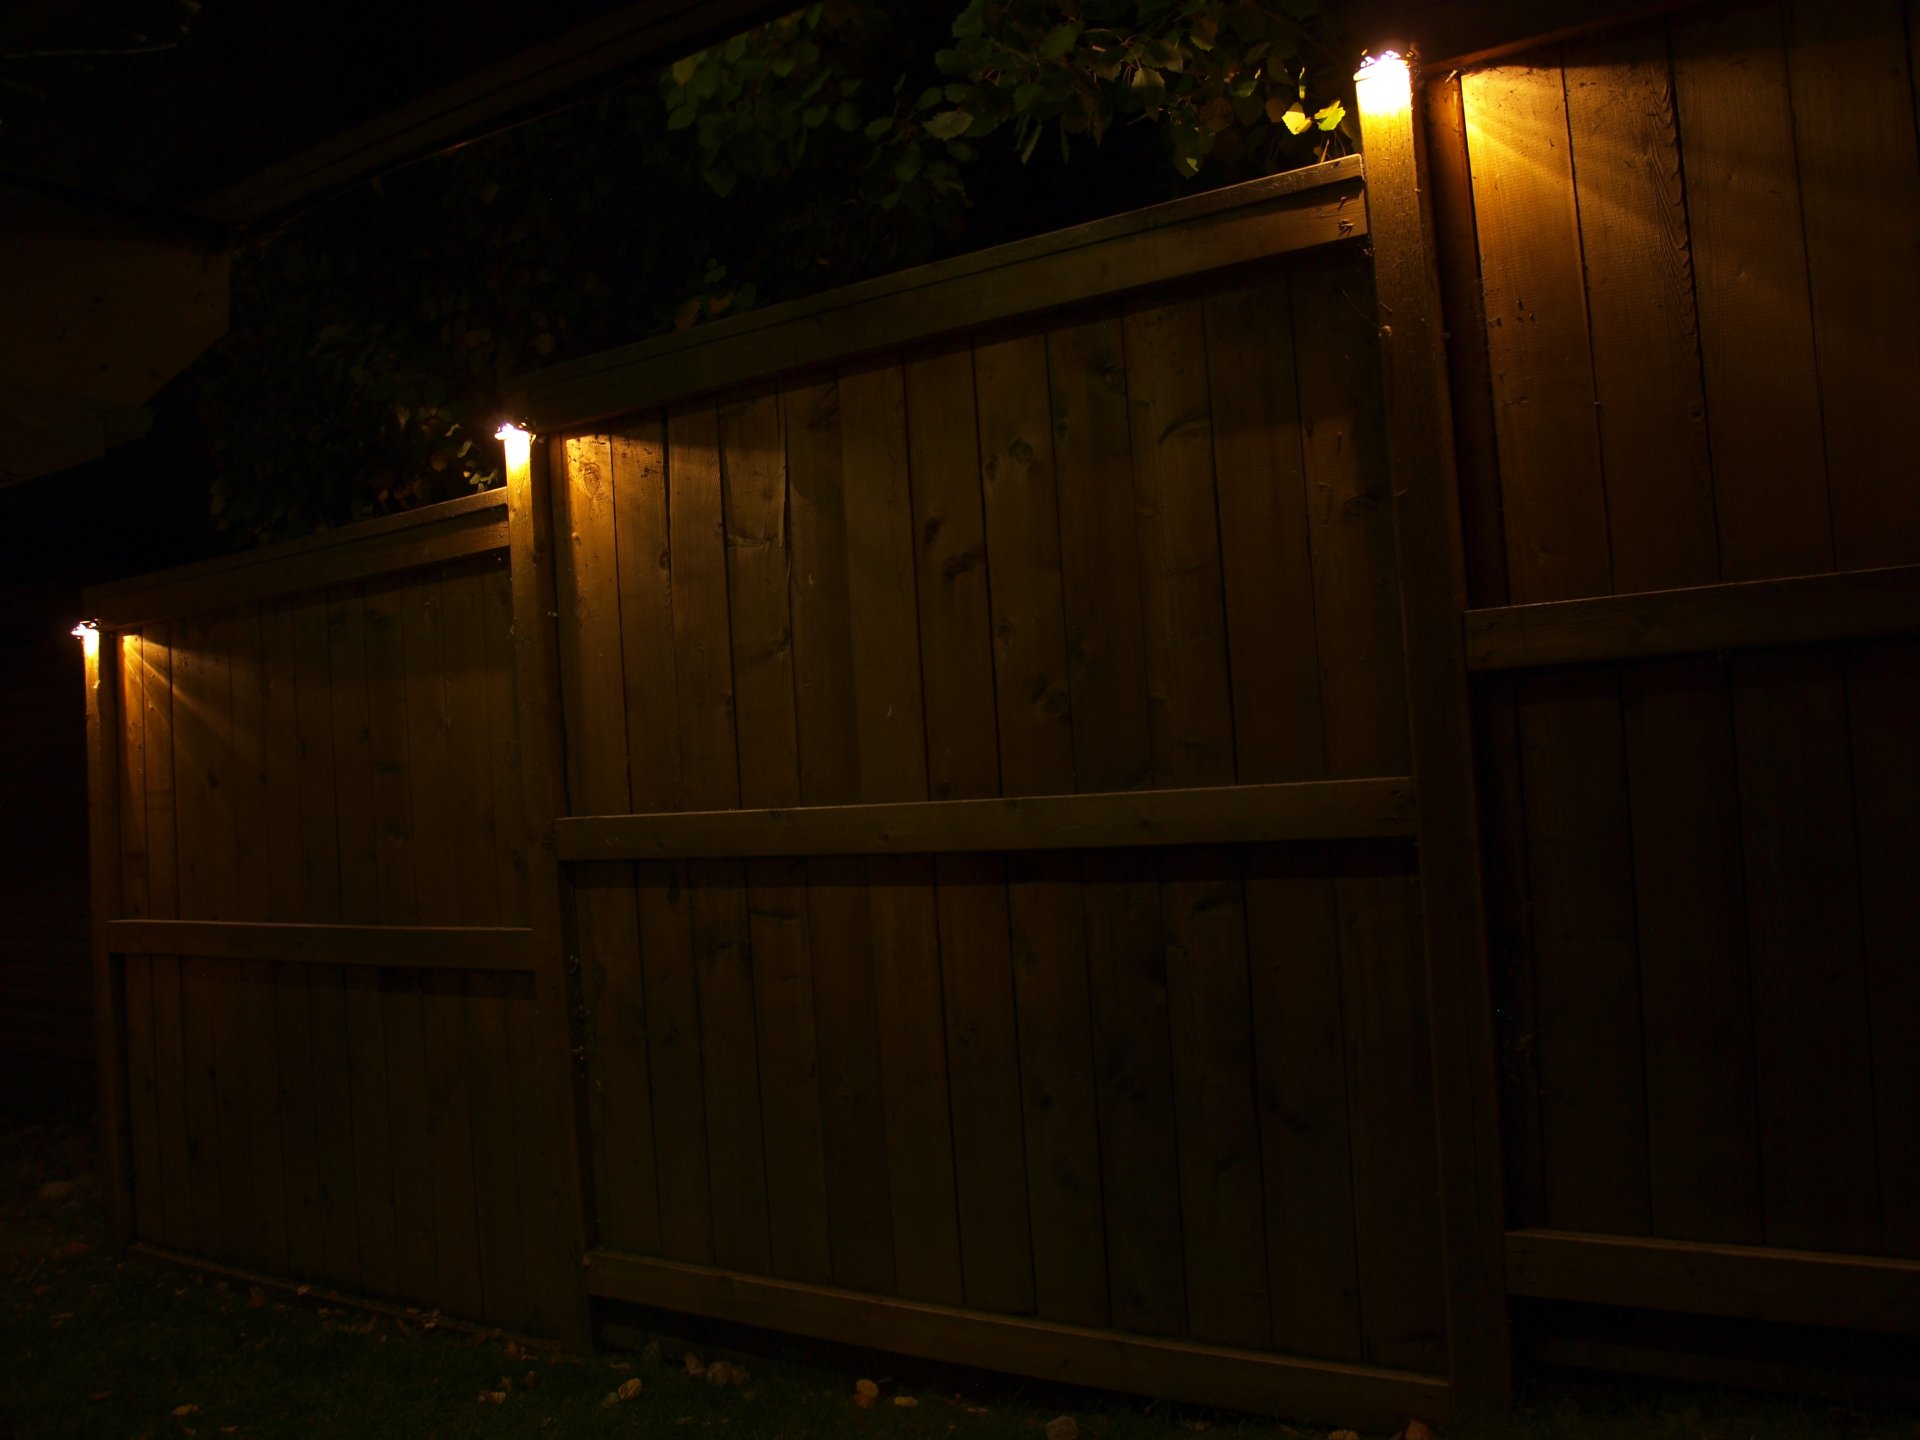
Cup style “Moon Light” mounted on a fence post

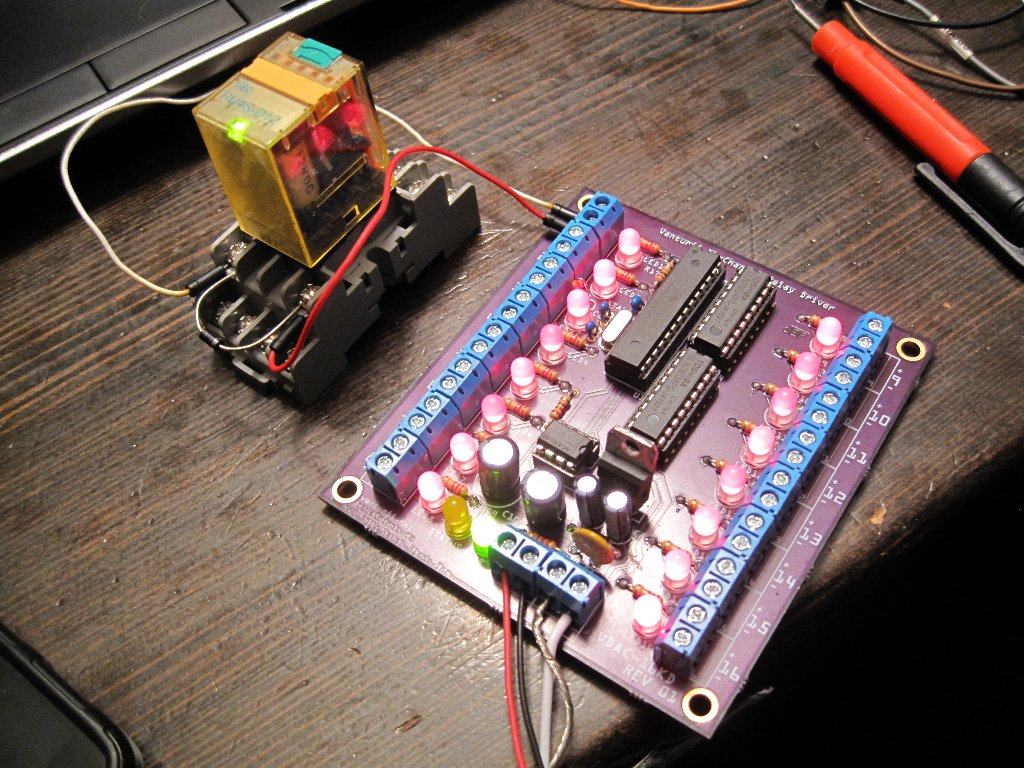
Mark gave me five of these moon shaped cup lights, and after much debating their destination, I realized that I had five fence posts along the darkest corner of the back yard. I mounted one and powered it off a battery to see if I liked the location, light cast, and ambiance. It was definitely a winner. With an 11 watt bulb in each, at about 6′ off the ground, they light up the area very well in the dark. Full power is definitely not needed on these either, so I took advantage of a surplus of MOSFET drivers at my disposal and wired them up with a home run from each light. This basically gives me the option of individually setting the intensity of each lamp individually. All manner of light patterns, sequences and uses come to mind and will be put into play in good time, but for the moment they are running paralleled off a single IRL540 MOSFET. Even with 5 x 11w = 55w @ 12VDC or 4.583 amps, the driver is cool to the touch. Data from a photocell capturing the ambient light level outside determines the output level of these lights, as they ramp up to full brightness as the sun goes down, and taper off in the morning as the first light of a new day dawns. The effect is nothing short of beautiful as they cast a warm half-moon-shaped glow on the ground and wooden fence boards. Tiny shapes cut into the top of each fixture allow tiny beams of light to escape onto the walls of the house and the deck, drawing the mind’s curiosity,  imagination, and fascination to their incandescent glow.

Cup Lights Mounted On Fence Posts Illuminate The Way

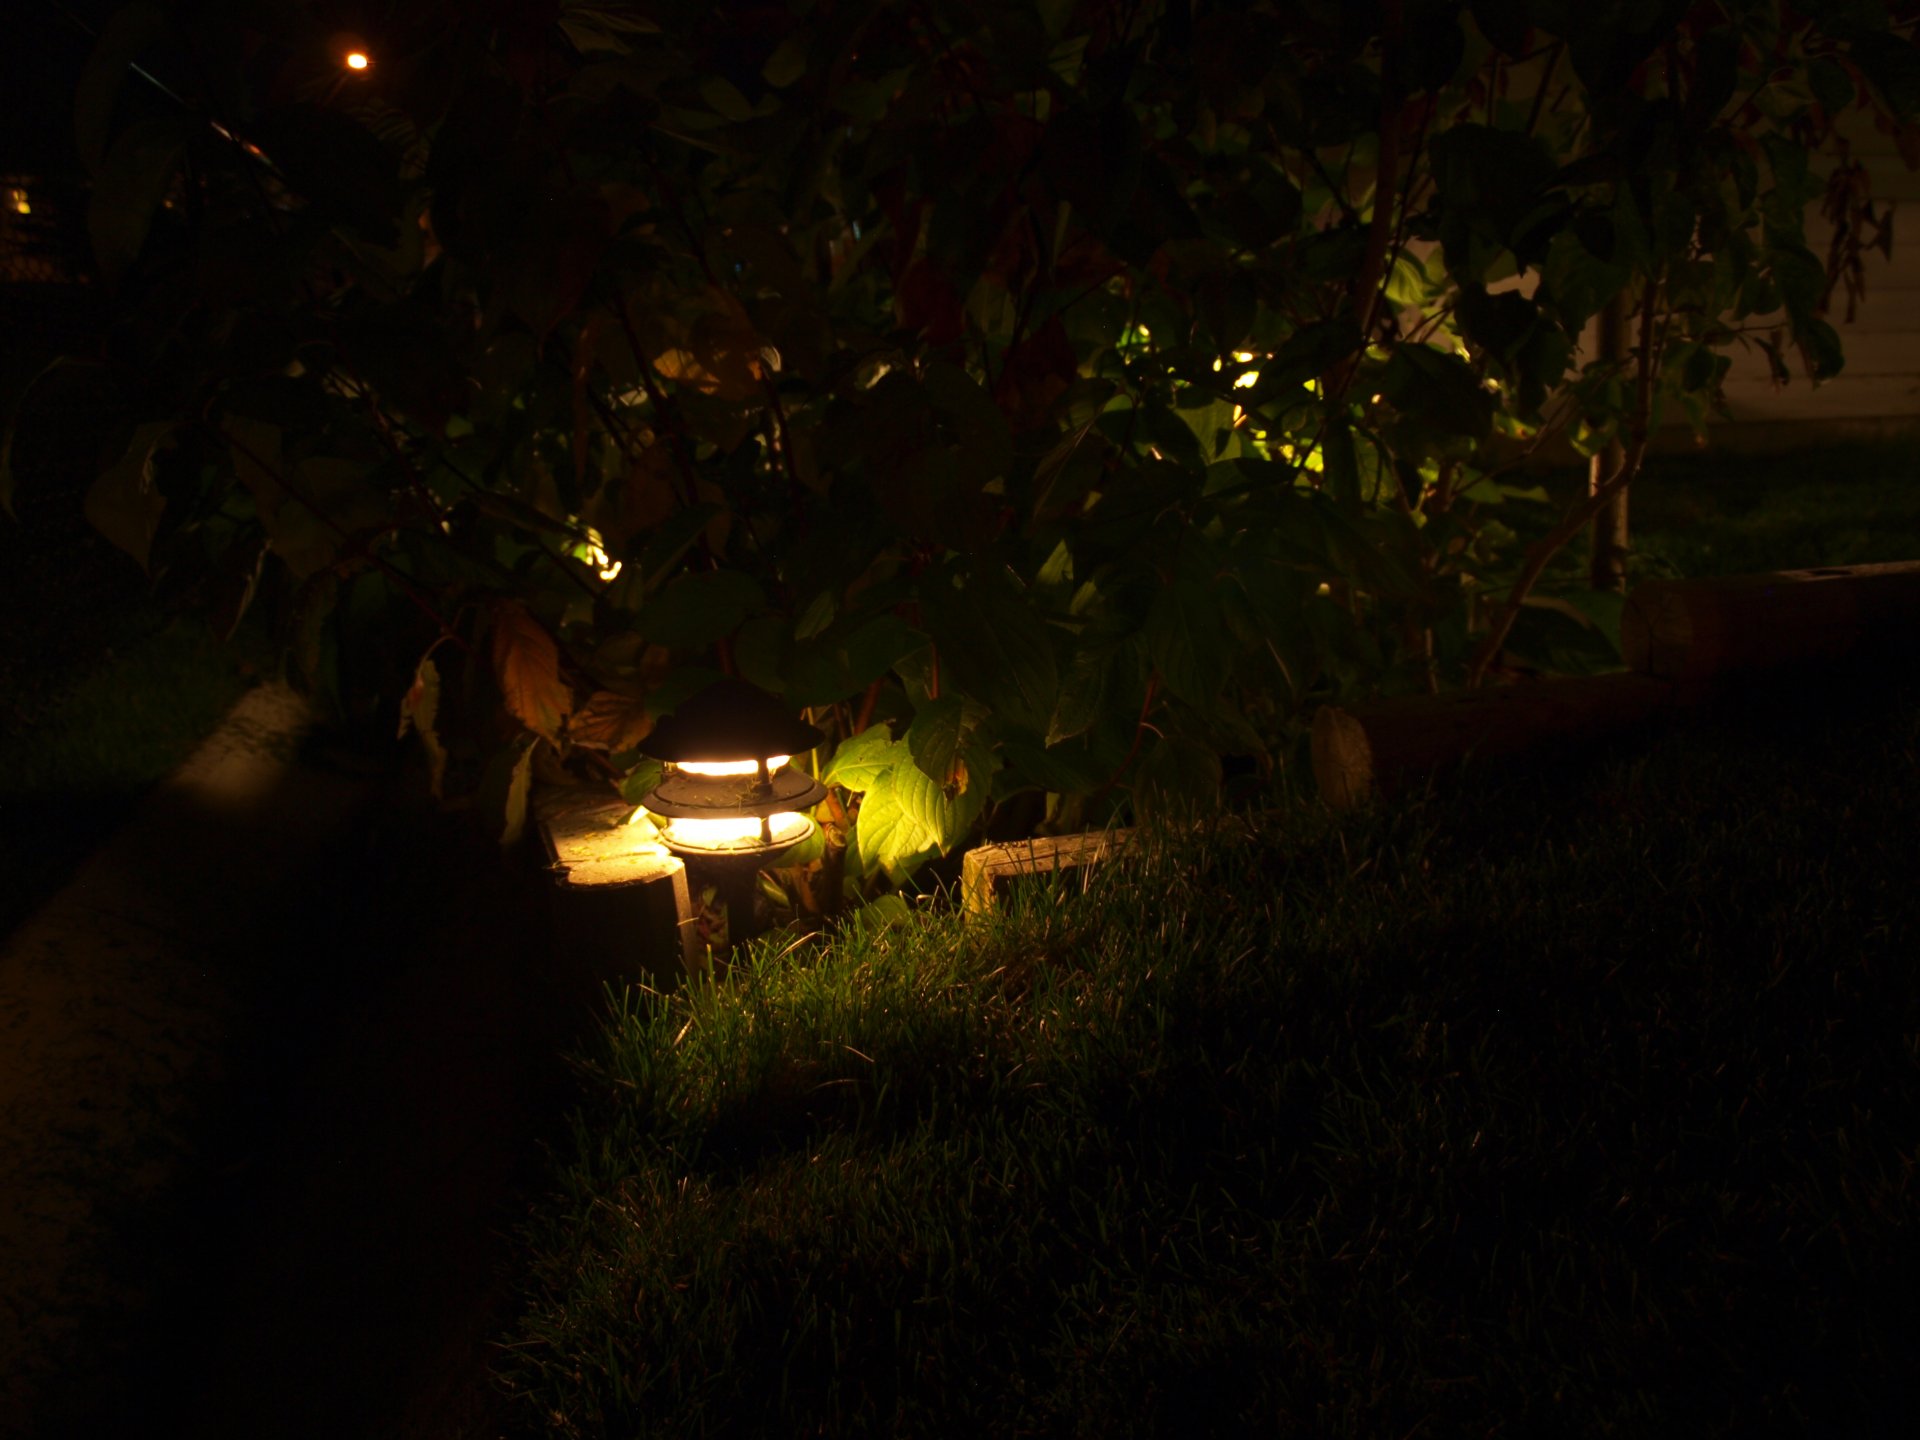
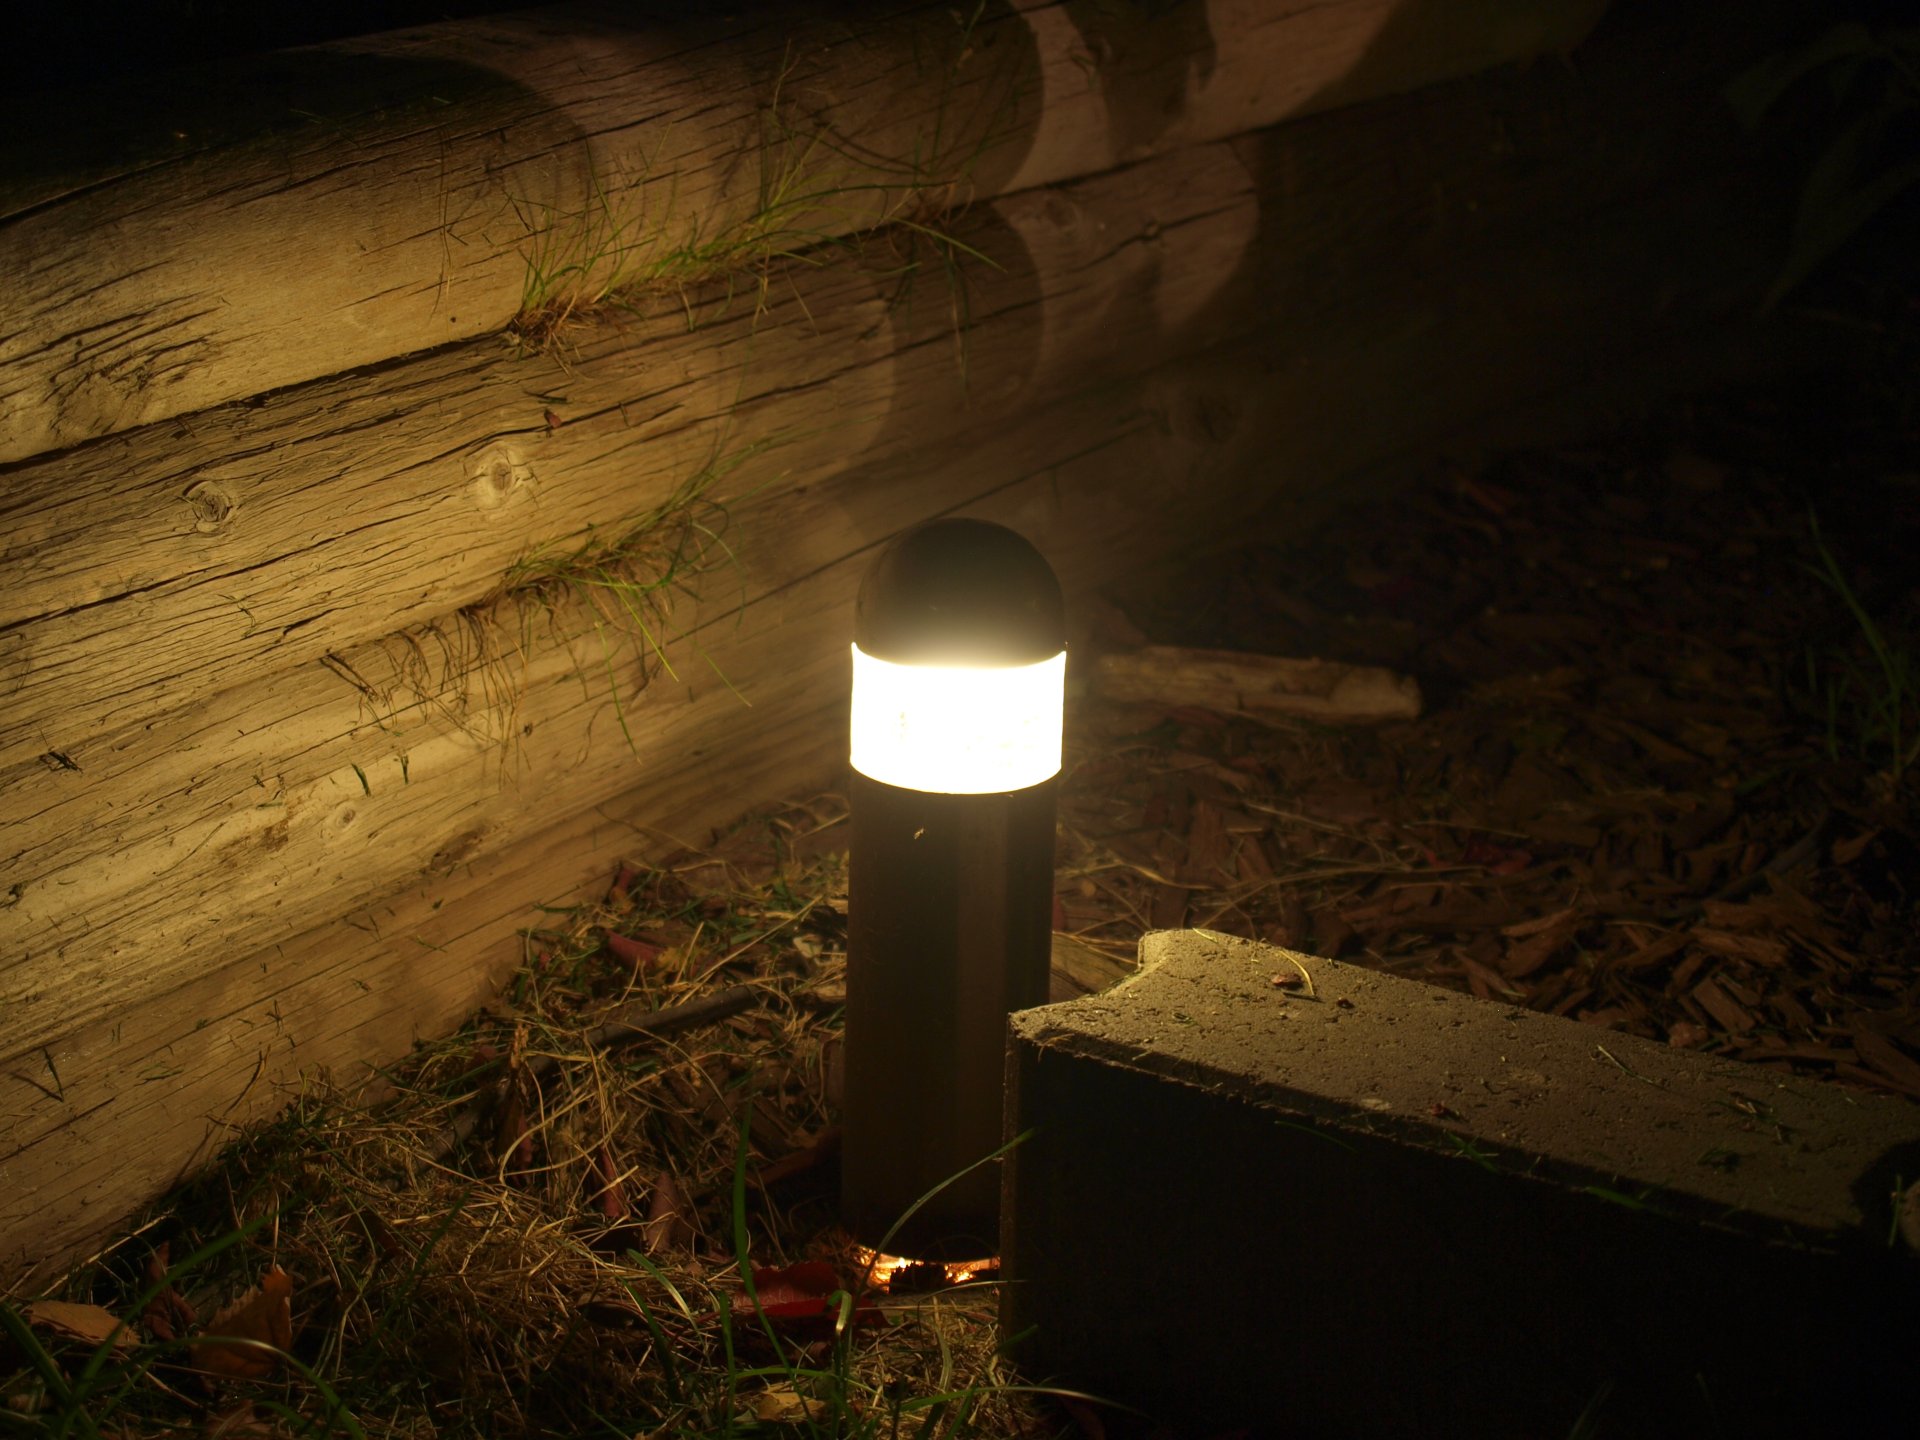
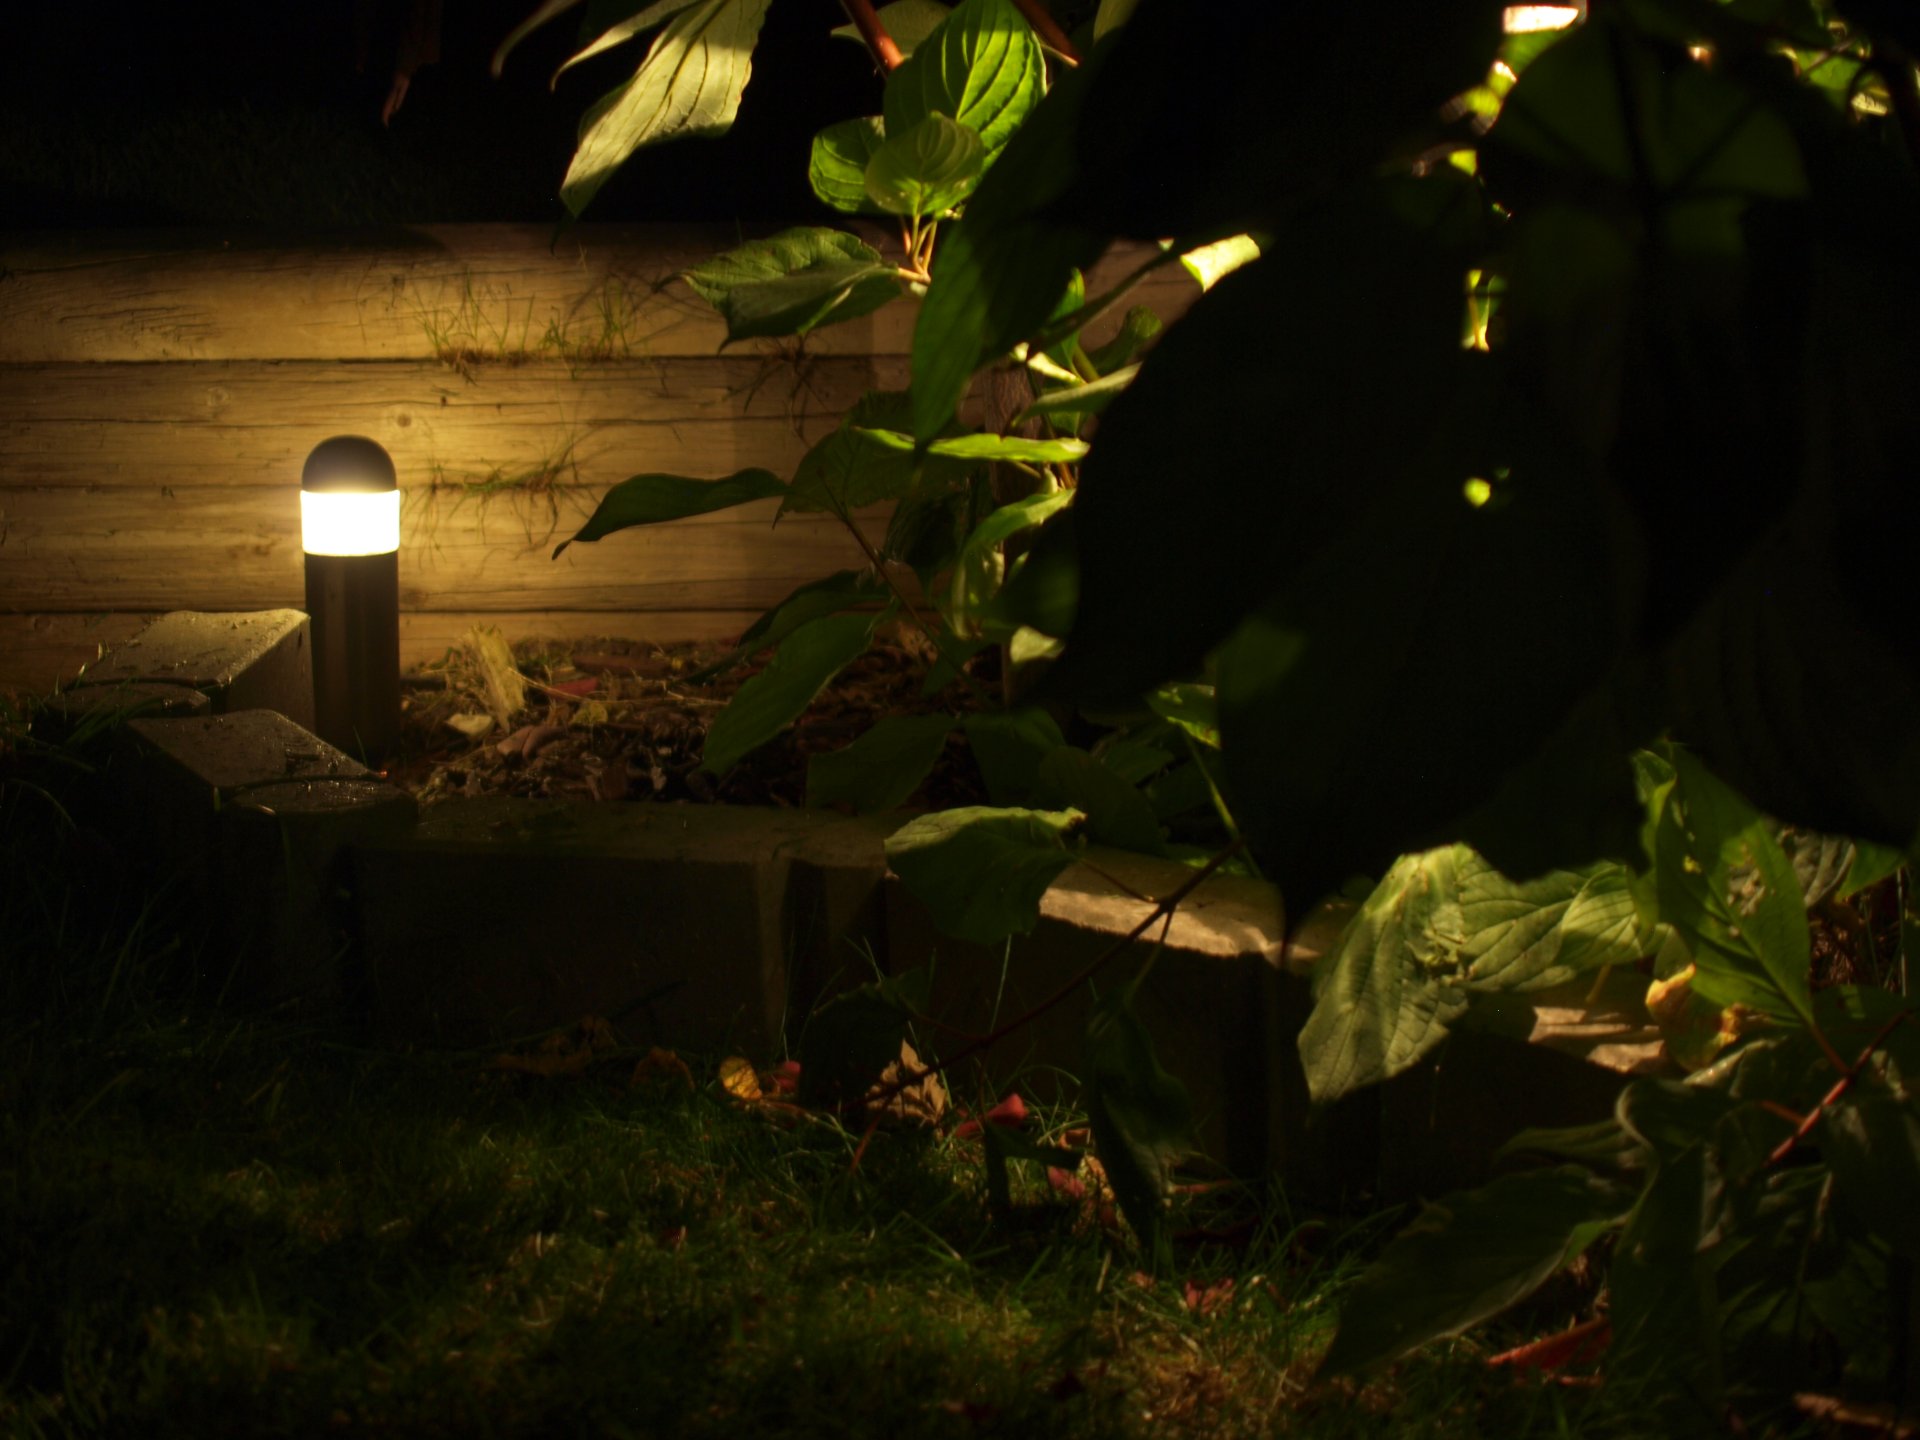
Elsewhere in my tiny back yard I have a clump of trees enclosed in decorative interlocking bricks. Mark was also generous in providing dozens of low voltage outdoor fixtures apart from the cup lights seen above. As a test, I installed a number of them in the tree pit to see which style might become my favorite. Mounted therein are three style: Two silver bollard-style fixtures with MR-11 lamps inside, shining upwards onto a chunk of glass that disperses the light in all directions, a Path Light style fixture and a traditional Pagoda style light all sit nestled within the decorative brick wall of my tree pit. I have to admit, each light has it’s own appeal, and a clear winner is tough to pick.

Two bollard lights stand like light houses inside fortress walls, beckoning to travelers from afar to come near their warmth. In this case, those travellers are mosquitos and moths, but the warmth is unmistakable.

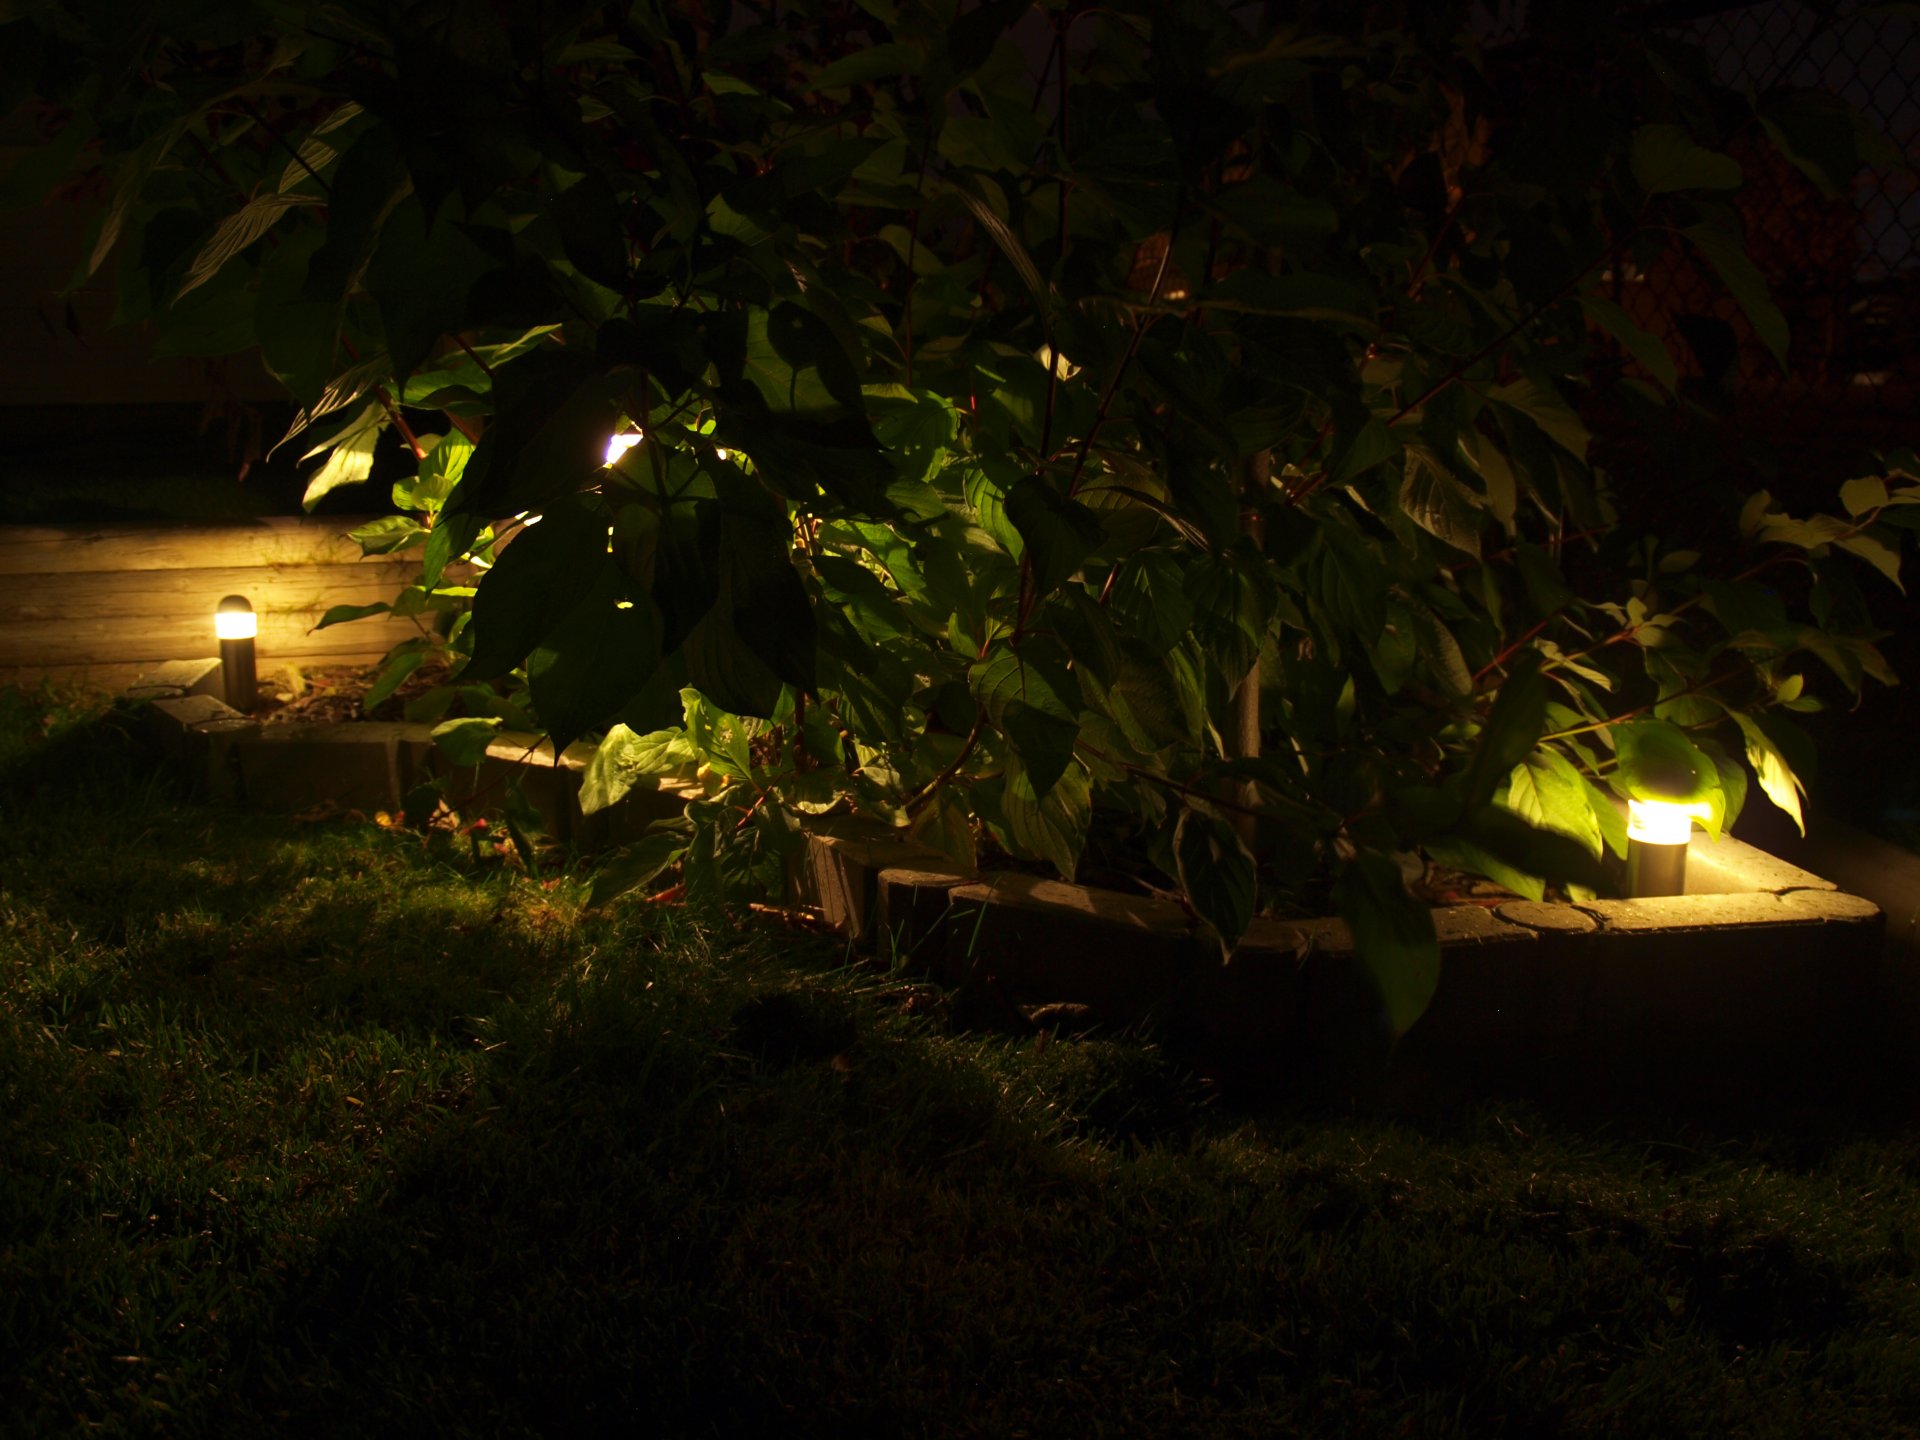
Two bollard lights stand like lighthouses inside fortress walls, beckoning to travelers from afar to come near their warmth. In this case, those travelers are mosquitoes and moths, but the warmth is unmistakable.

OLYMPUS DIGITAL CAMERA OLYMPUS DIGITAL CAMERA OLYMPUS DIGITAL CAMERA OLYMPUS DIGITAL CAMERA

Here are some of the features slated for the upcoming release of Venturii 0.5.0:

  • XML Message Queue-based Inter-Process Communication
    • Ensures all messages get delivered between modules and Decider
    • Re-sends messages that are not acknowledged
    • Traps messages that are not understood by the other party for examination (troubleshooting)
    • Provides an idle “ping” mechanism for ensuring the connection is good, taking corrective action (reconnecting) if it detects a problem in the TCP/IP socket.
  • WebSockets-based User Interface API for developing web applications that communicate in real time with Decider for live status updates and instant control over any device attached to Venturii.
    • Streamlines application development, platform independant.
    • WebSockets is supported by recent versions of all major browsers reducing browser cross-compatibility issues
    • Messages from the server can reach the clients immediately, no waiting for a poll cycle.
    • Low CPU overhead for multiple concurrent client connections
    • Sample web-based UI code will be included, though a complete UI is not scheduled for release in 0.5.0 due to time constraints.
  • Event Counter
    • Count the occurrences of rising edge, falling edge, change of state, or all changes to a digital source.
    • Various logging mechanisms:
      • Event Occurrence
      • Cumulative Tally over Defined Periods of Time
  • Value State Timer – measures the amount of time a source spends at each value point; effective on both digital (two-state) and analog (multi-state) input sources to provide a “run-time” counter, logging things like “How long did my furnace run today?” or “How many minutes of sunlight did we get in February?”
    • Smart Start – planned feature in Decider will backfill the Value State Timers for each input when a configuration set is loaded, determining retroactively the amount of time the value spent in every state so that the timer is always up-to-date and Decider resets do not lose information.
  • New logging mechanism within the GVES database, specifically aimed at supporting the Value State Timer though it may see other uses in time.

There is no release date set yet, but testing is underway at the moment and I hope to have 0.5.0 released soon.

I have a water softener installed in my house. It is a wonderful appliance, and with the hard water in this area it is a must for anyone who does not love scraping calcium off of any surface water touches. The water softener itself is maintenance free, but you need to keep it full of salt so that it can do it’s job. I always forget to check it, and it’s usually not until I start noticing the glass shower door getting pasty that I remember to check the tank (which by now is almost certainly empty.) If only there was a way to monitor the level of the salt in the water softener, and get some warning when it is getting low. This next project will attempt to solve that problem using an interesting type of sensor – sound.

As human beings, we use our eyes to judge distance to objects. By having two eyes set apart, our brains can utilize the information received from both eyes and determine with relative accuracy how far away the object we are looking at it from our current position;  I can look into the water softener tank and see how full of salt it is. Accomplishing the task using computer vision is remarkably more complicated. However, there is another technology that has been around for decades and in fact used by some animals (bats, for example) since their inception. Sound travels much slower (comparatively) than light, and so by sending out a burst of high pitched sound, listening for that same sound to echo off an object and return to us and then measuring the time it took for this to happen, we can determine with a simple mathematical formula how far away an object is. Anyone whose used one of those electronic measuring tapes found at most hardware stores is using this technology. I bought 10 ultrasonic range finders from Aliexpress for about a dollar apiece (including shipping!) and thought this might be a good application of such a sensor.

The Plan:

I’m going to mount the ultrasonic range finder on top of the water softener, aimed down at the bottom of the tank. With the tank empty, I plan on taking a distance measurement with the sensor as an “Empty” reading. (Remember, the sensor only tells us the distance between itself and the closest object that reflects the sound it sends out. It is up to us to determine what that data means.) Then, I will fill the tank with water softener salt and take another measurement as the “full” reading. By polling the sensor periodically and calculating the distance it reports relative to our “full” and “empty” distance measurements, we should be able to determine how much salt is in the tank is at any given time.

Step 1: Determine a good location. I removed the lid of the water softener and found lots of room inside for all sorts of devicery. I picked a spot that should give a pretty reasonable reading of the salt level and drilled a pair of holes. Here you can see the sensor sitting beside the holes it will be mounted into:

02_holes_cut_in_water_softener_for_ultrasonic_range_finder

Next, I placed the sensor in the holes. I used a step bit to get the second hole just the right size  so that the sensor fits snugly into it. In fact, it should actually hold the sensor in place.

03_ultrasonic_range_finder_mounted_in_water_softener

You can see from the bottom (inside the tank) what the sensor looks like:

04_ultrasonic_sensor_from_inside_water_softener


And lastly, here is the whole water softener, tank and sensors in the same shot:

05_water_softener_with_salt_level_sensor

Lastly, I need to connect the sensor to a board that can trigger it and interpret the response, and send that data back to Venturii. I’ve started working on the code that will get merged into the VDAC (Venturii Data Acquisition and Control) firmware tree, and I think my prototype VSAC board will make a good candidate for connecting these types of sensors to since we don’t need very many samples from this thing – one per minute (or maybe even one per hour) is probably plenty. Once I get that done, I will take the samples (conveniently, the tank is practically empty at the moment.) This might also be a good time to get out the wet vac and empty the bottom altogether. It’s never been cleaned since I’ve been in the house – perhaps even a good hose down might be in order. I’ll post back in a few days and report on the progress – and hopefully results!

The first Venturii-based circuit board comes to life, showing all it's outputs active.

The first Venturii-based circuit board comes to life, showing all it’s outputs active.


This circuit board represents a childhood dream coming true for me, as I have always been fascinated by electronics and the computerized control of devices. Perhaps it should not be surprising then, that the first PCB I designed, populated, troubleshooted, and then tested is one which accomplishes that very thing.

The concept of controlling devices from a computer is certainly not new. In many aspects, this project itself is not special at all. The Venturii VDAC-16KD is a 16-Channel Relay Driver board, that essentially allows one to power up to 16 x 12VDC outboard relays and control them using Venturii. This device talks over RS-485, allowing it to be up to 4000 feet from the computer or a serial to IP converter, but future devices will have such a device built in and will talk to an IP network directly. In many ways, this project has been a “proof of concept”, as well as a learning experience with several mistakes made and learned from along the way. Rev 02 of this board will include a reset button, the Status LED replaced with Tx and Rx LEDs, an ICSP header, test pins, TTL breakout pins, and quite possible a few other enhancements. All that aside, it is working now and very well, and will become an integral part of my house’s automation and specifically, it’s whole home audio distribution system, controlling 4P/DT relays which will connect / disconnects sets of speakers from various rooms & places around the house. It is very exciting to see this project take shape as it branches out into the realm of hardware.

Venturii is an open source automation, integration and data normalization platform – all it’s software and hardware is open source including the this relay driver. This board so far has been created using Fritzing, an open sourced PCB development platform. Based on the Atmega 328P microprocessor, this license enables anyone with the appropriate skill, time and inclination, to modify the software running on this device to whatever need they have for it – and they are free to do so under the terms of the GPL v2 or later license so long as they also make their modifications open source and under the same terms and conditions. If you would like to get involved with Venturii or to try it out for yourself, leave a comment or send me an email.

The very first Venturii PCB undergoes testing on the kitchen table, controlling a 12V DC 4 Pole, Double Throw "Ice Cube" style relay.

The very first Venturii PCB undergoes testing on the kitchen table, controlling a 12V DC 4 Pole, Double Throw “Ice Cube” style relay.