Ever since I was a little boy I enjoyed water. In particular I love moving water, and to be exact – controlling the flow of water. Recently I found a sketchbook from when I was about 7 or 8 depicting a water fountain idea I had at that time. It was technically detailed, including the pump, plumbing and electrical connections. It even had sensors for measuring water level, and a top up water supply controlled by an electric solenoid valve should the water level dip below the mark, protecting the pump from dry running and burning out.
Fast forward 25 years or so, and the opportunity presented itself to actually build a water fountain. While not quite as elaborate as my original childhood design (which included multiple basins and levels, a brook and collector basin) this one would serve as a good starting point in fulfilling a childhood dream. In fact, it turned out to be simple enough to build, and has already provided several years of enjoyment to myself, my family, and everyone who walks past our house and notices it.
First, a parts list:
- Five Gallon Bucket. Provides a reservoir for the water.
- Fountain pump. I used a 200 GPM model purchased from Home Depot, but many models & sizes will work.
- Several feet of copper pipe. I used some scraps I had lying around, but total quantity would amount to less than 8′.
- Plastic Tubing. Connects the outlet of the fountain pump to the copper pipe.
- Copper T’s and Elbows. Used to build the base and the spout structure.
- Decorative Tap. I used a classic model purchased from Plumbful Warehouse, but many styles would suffice.
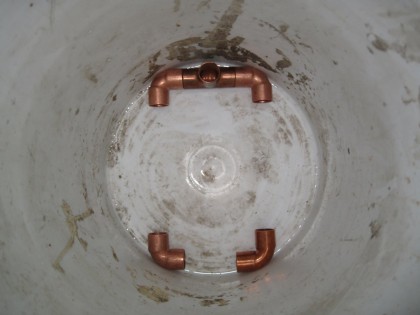
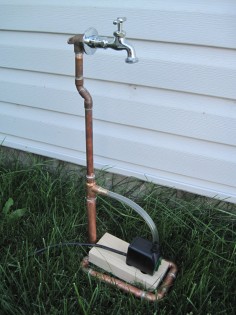
Start by placing four copper elbows in the bottom of the five gallon bucket. This will give you an idea of how big your base for the spout structure will end up being. It will also show you how long each piece of copper pipe will need to be to make the base fit your particular bucket. Not all buckets are created equal! Next, cut pieces of copper to connect the copper elbows to each other, forming the base of your fountain structure.
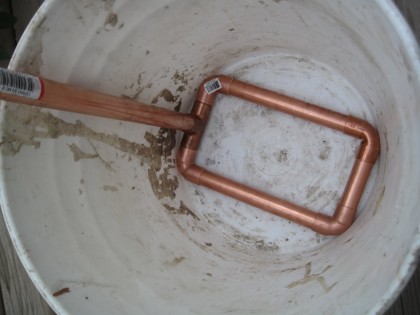
The base should look something like this. Next you need to determine how far up the vertical pipe you want to cut in your fountain pump connection. Generally you want to keep the water intake on your pump off the bottom of the bucket to prevent it from getting clogged with debris. I decided to place a two-by-four under the pump, and so measured off the appropriate height from there to determine where to cut in the copper T in the vertical pipe.
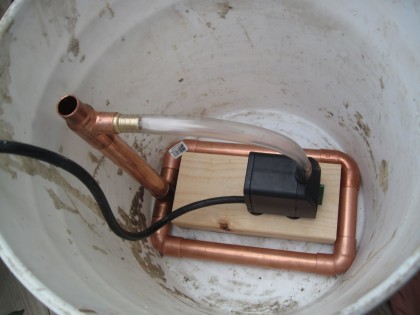
While getting the sizing just right for the base of the pump and outlet stand, I tested the pieces by assembling them and placing them inside the bucket where they would live.
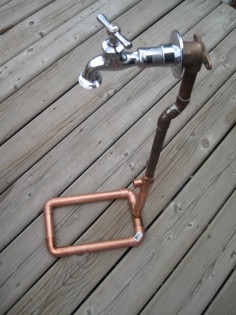
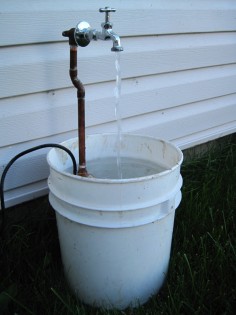
I went with a 3/4″ to 1/2″ x 1/2″ Tee to reduce the number of fittings I’d need. The base ended up being all 3/4″ copper, while the riser ended up being 1/2″. Because of the weight of water, I thought it would work better to have less water weight in the vertical part for the pump to have to lift. Of course on a fountain this size it probably made little to no noticeable difference, but in my case it seemed like a good idea at the time. Next I attached a piece of scrap copper I had lying around which included a dog leg kick already, and cut it to the appropriate length to give my fountain aproximiately a 1′ drop from tap spout into the bucket. Too much of a drop and you will get a lot of splash & splatter, too little drop and you will not hear the sound of the water. Plus I did not know what I would be doing for cover over the bucket, so I wanted to leave my options open.
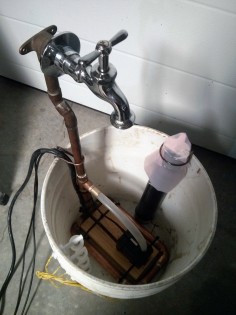
I used a PEX to Copper nipple to connect the fountain pump to the copper Tee, and about 12″ of 1/2″ Clear Plastic Tubing from the cutoff section of my Home Depot to complete the waterway. One caveat that should not have caught my by surprise was that the two by four that the pump sits on is quite buoyant in water! I ended up having to tie wrap it to the copper tubing base to keep it from floating up and out from underneath the pump!
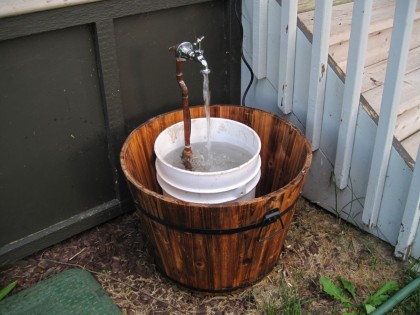
Finally, the moment of truth came when I plugged the pump in and water immediately began to flow out of the tap into the bucket. It was a beautiful thing.
Of course, I had to Venturii the fountain up a little. I added Dallas DS18B20 temperature sensors to the pump and to the copper base, intending to get an ambient water reading and pump temperature reading. I also installed four float sensors at four different heights to give basic water level readings of 1/4, 1/2, 3/4 and 4/4 full, and also put together an Ultrasonic Range Finder with a ping pong ball inside a 2″ ABS pipe to attempt to read the water level more accurately. This is the same approach I used to measure the salt level in my water softener, but never got tested before I deployed the fountain. It may need to be re-engineered.
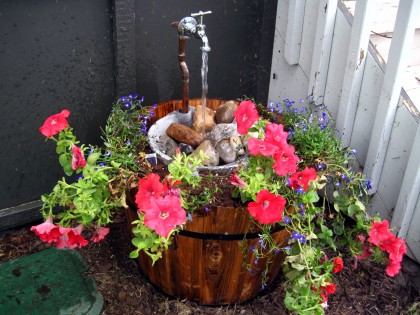
Last but not least, my wife and I filled the bottom of the whiskey barrel with gravel for drainage, and then filled the rest of the whiskey barrel with planting soil. Into that we planted several varieties of dangly flowers, and the result turned out quite nicely.

